Comfort

Comfort Foodnoun, foods consumed to achieve some level of improved emotional status, whether to relieve negative psychological affect or to increase positive. Food that brings some form or measure of comfort, sense of well-being, or easy satisfaction, usually from being warm and filling such as a dish made with a staple food, or basically pleasing such as sweets or desserts.

Why do we crave comfort food when we’re feeling down, have a cold, or sense a change in weather? I think it’s pretty simple: comfort foods nourish our bodies and our souls. Food that is simple, delicious and soothing reminds of us simpler, carefree times. Comfort foods can warm our hearts and our cold fingers and toes.

Can my mom’s chicken noodle soup, warm cinnamon buns or freshly baked cookies really improve my emotional status? I feel a cold coming on (the roof of my mouth hurts, I was really slow on my morning run, and my eyes are tired) and I sense fall in the air. I’m willing to curl up on the couch with a good book (I’ve been savoring the new Kate Furnivall novel) and give old-fashioned Oatmeal Cookies a try. I’m sure a mega amount of carbs and calories will go a long way to improve my emotional well being.

On a side note: a recent study by the University of Illinois found that guys prefer ice cream, soup, pizza and pasta. Us girls selected sweeter items, with ice cream, chocolate and cookies topping the list of preferred comfort foods. Big surprise.


Oatmeal Cookies

Source: Family Recipe

  • 1 C butter at room temperature
  • 1 C packed brown sugar
  • 1 C white sugar
  • 2 eggs at room temperature
  • 1 tsp. vanilla
  • 1 1/2 flour
  • 1 tsp salt
  • 1 tsp baking soda
  • 3 C oats
  • Options:
  1. chopped pecans
  2. coconut
  3. raisins
  4. chocolate chips
  5. toffee bits
  • Cream butter and sugars until light and fluffy. Add eggs one at a time beating well after each addition. Add vanilla until well blended.
  • Sift together flour, salt, baking soda and oats.
  • Mix butter mixture and flour mixture.
  • Add in your optional ingredients making sure they don’t total more than 2 C.
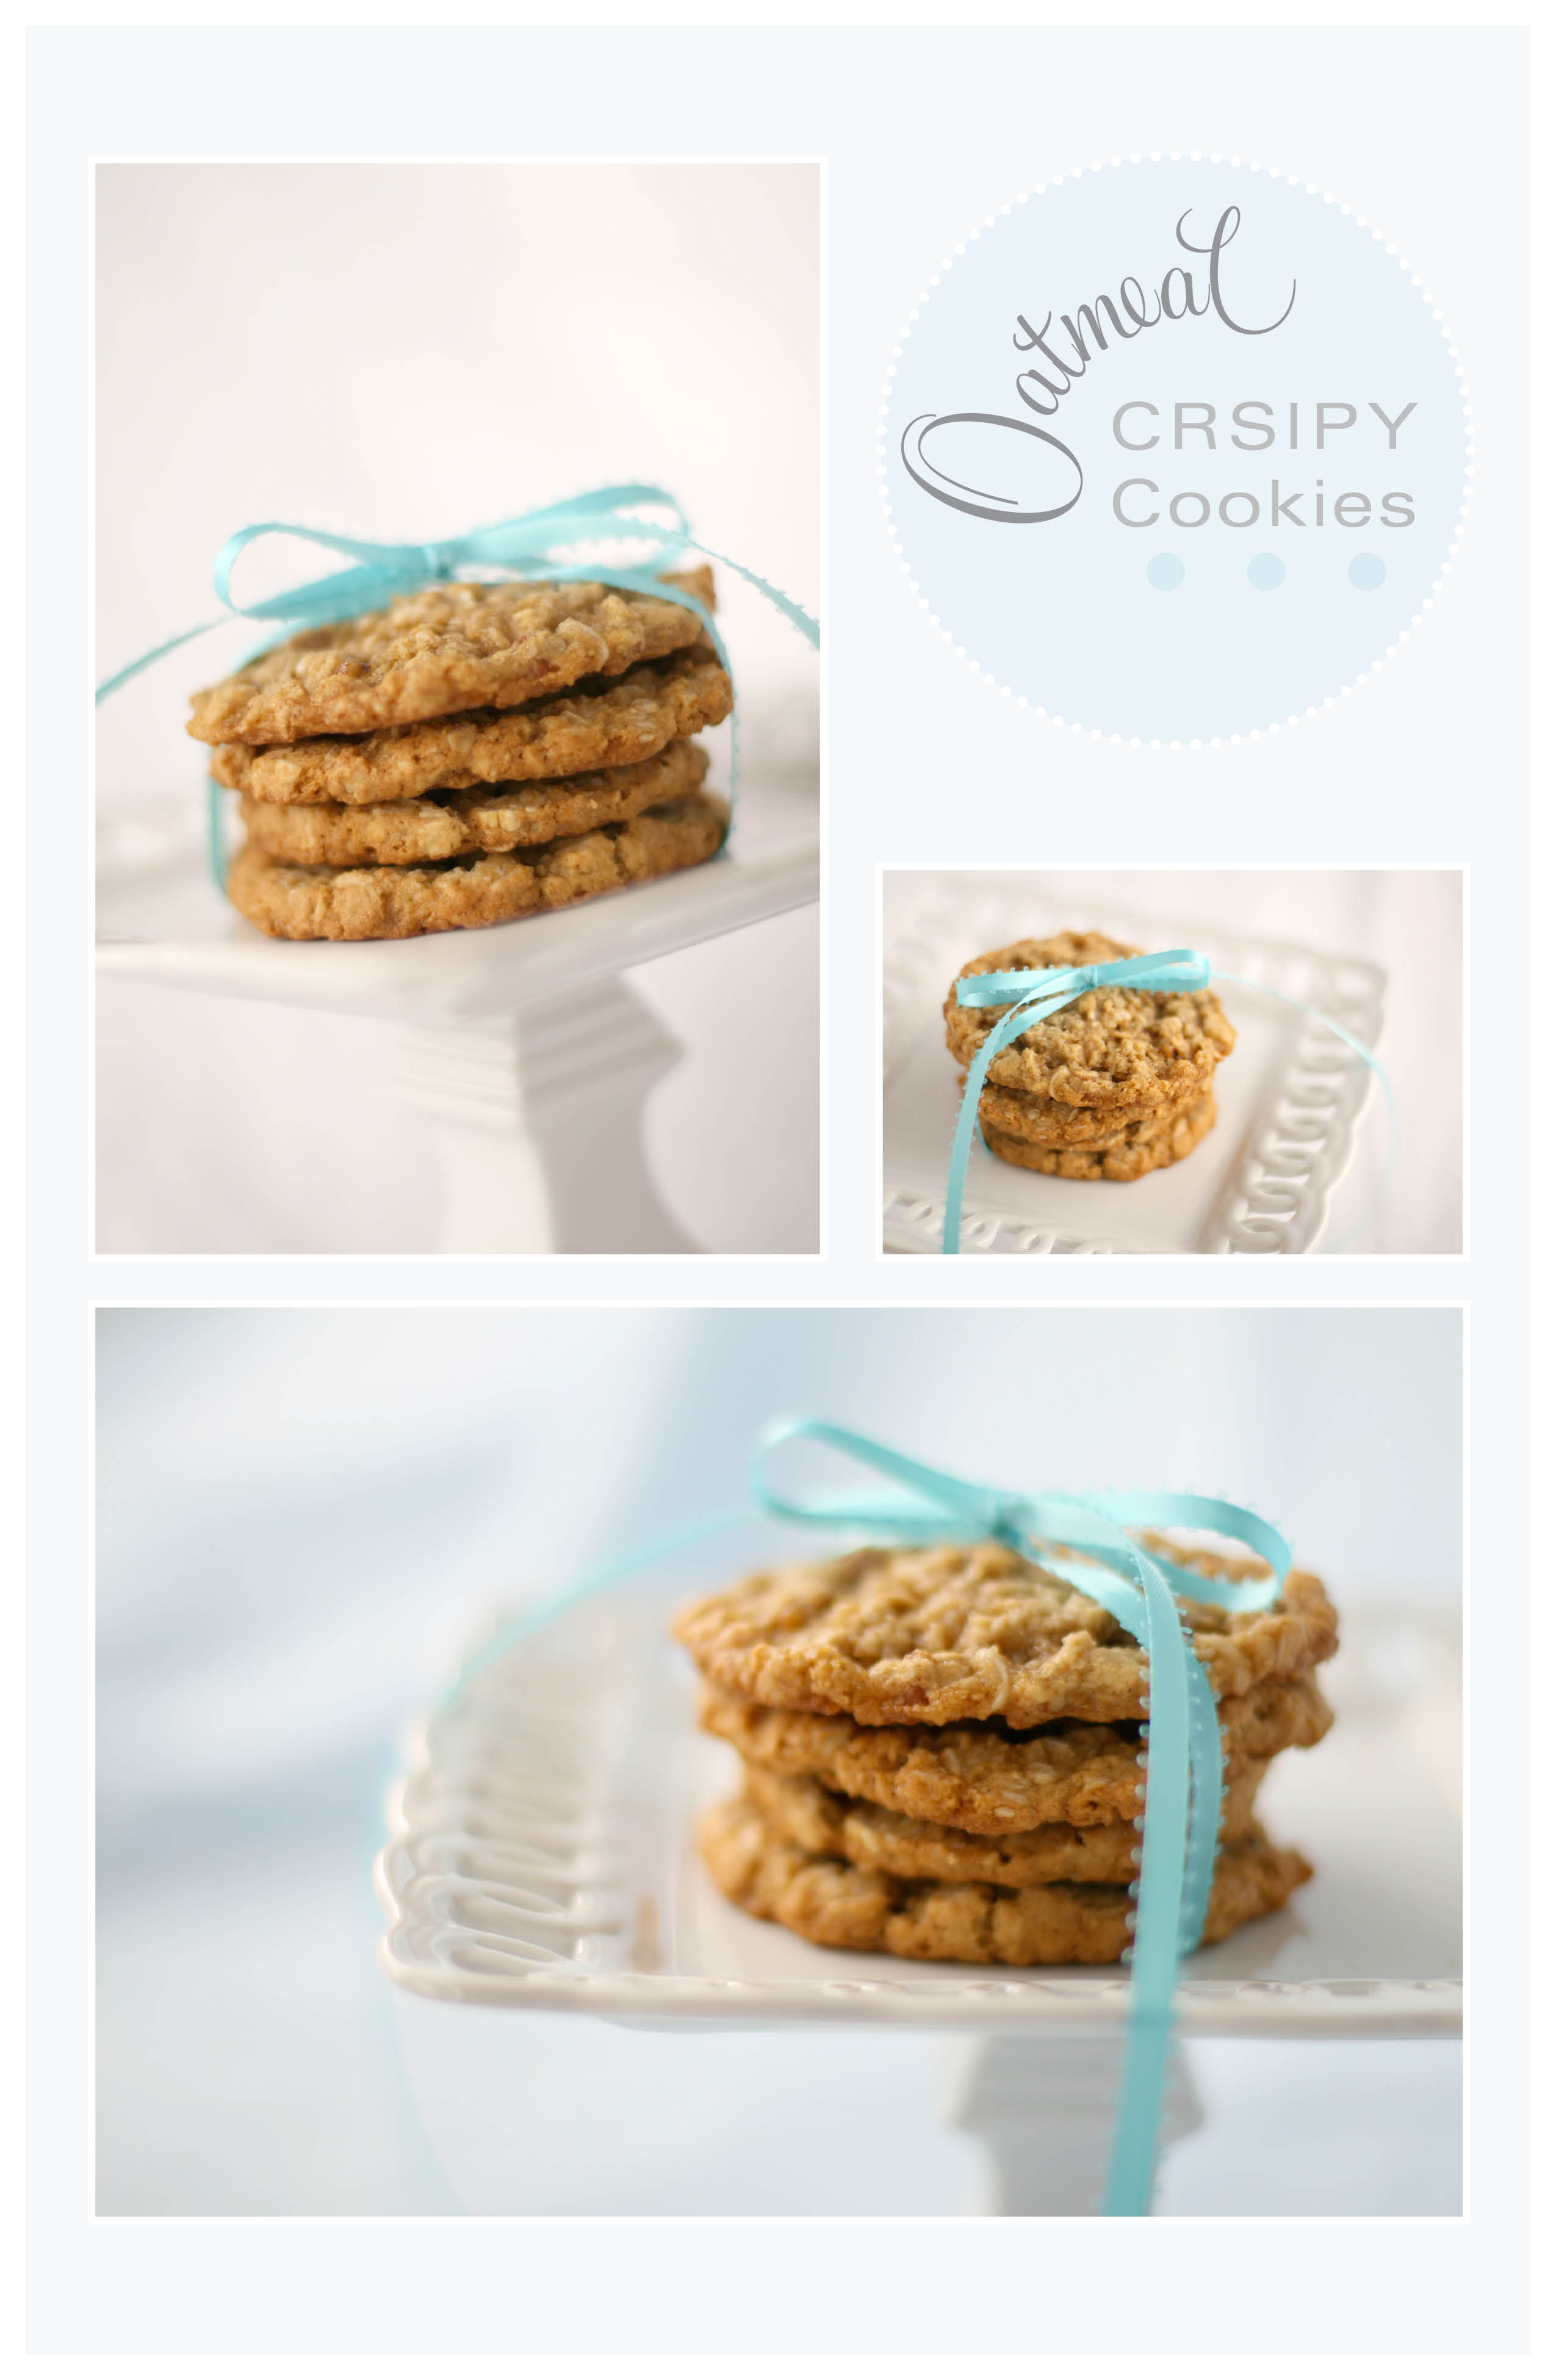
  • If you like a flatter, crispier cookie as pictured above, roll dough into two logs, wrap in saran wrap and chill at least 4 to 24 hours. Then cut into 1/2″ rounds. At this point you can either bake the cookies at 350 for 9-11 minutes or freeze them unbaked for a little comfort at a later time. If you like a thicker cookie, drop by spoonfuls onto a cookie sheet then chill or freeze as per above.
  • Makes about 30-36 cookies.

Notes:

  • The great thing about this recipe is you can do whatever you fancy on any particular day. This time around I added 1 1/2 C unsweetened coconut and 1/2 C chopped pecans. Next time around….who knows?

The Love Affair Begins

You know that feeling of intense pleasure you get from walking out to your garden on a bright yellow day, picking a summer-ripe tomato from the vine, still warm from the sun, and taking a luscious bite, seeds spurting, juices dripping down your chin….

No? Me neither.

I can’t say I really enjoy tomatoes. I like pizza sauce, salsa, and all kinds of tomato derivatives well enough but I’ve never enjoyed a plain, old-fashioned tomato on it’s own accord. This summer, however, I am trying to incorporate fresh, ripe tomatoes into my diet. I started slowly with a tomato slice on a burger. And now, I must admit, I really enjoy a toasted tomato sandwich: my mom’s home made brown bread, thick slices of tomatoes picked that morning, some fresh dill, a little goat cheese (who am I kidding: a LOT of goat cheese). So simple and fresh.

Maybe I haven’t given tomatoes a fair shake in the past. Centuries ago they were thought to be an aphrodisiac: the French called the cherry-red tomato d’amour or poma amoris. The love apple or fruit of love. Maybe I could learn to love a tomato. I certainly loved the Tomato & Zucchini Hand Pies I made last weekend. I have a pasta recipe with cherry tomatoes begging to made. Maybe this is where my love affair with tomatoes begins: after all, the French couldn’t have been that wrong…

Tomato & Zucchini Hand Pies

adapted from: marthastewart.com

makes 12 hand pies

Pate Brisee (the fancy, French way of making Pie Crust):

  • 2 1/2 C flour
  • 1 tsp salt
  • 2 sticks butter, cold
  • 1/4 – 1/2 C ice-cold water
  • Sift together flour and salt. Mix in butter until mixture resembles coarse meal or butter is in pea sized chunks.
  • Slowly add 1/4 C water. If dough is too dry add more water 1 Tbsp at a time.
  • Divide dough in half, wrap in plastic, and chill for at least 30 minutes.

Filling:

  • 4-5 large, ripe tomatoes cut into 1/2″ slices
  • 1/2 purple onion, thickly sliced
  • 1 medium zucchini cut into quarters
  • 1 Tbsp extra virgin olive oil
  • 1 Tbsp balsamic vinegar
  • Salt and pepper to taste
  • 2 Tbsp finely chopped, fresh oregano
  • 1/2 C crumbled goat or feta cheese
  • 1 large egg white beaten
  • Preheat oven to 400 degrees.
  • Lightly grease a muffin tin.
  • On a lightly floured surface, roll out dough to 1/8″ thick. Cut into 4″ squares. Press each square into the cup of your muffin tin leaving an overhang. Chill for another 30 minutes.
  • Meanwhile, place tomatoes, onion, and zucchini on a rimmed baking sheet. Drizzle with olive oil, balsamic vinegar and salt and pepper. Roast about 30 minutes or until tomatoes begin to shrivel. Let cool slightly then transfer to a bowl. Chop any large pieces to about 1/2″.
  • Divide half the oregano and cheese among the 12 dough lined muffin cups. Top with the tomato-zucchini mixture. Sprinkle with remaining cheese and oregano. Fold corners of dough towards the centre and brush with egg wash.
  • Reduce oven heat to 375. Bake pies until crusts are golden brown about 50-60 minutes.
  • Let pies cool completely in the muffin tin on a wire wrack.
  • If not eating the same day, pies store well in the muffin tin in the fridge for about 24 hours. Bring to room temperature before serving.

Notes:

  • I think I should have rolled the dough thinner; the pie crust was a little thick. I used the entire recipe for 12 hand pies. Next time I would try and use 3/4 of the dough. Maybe I would use the remaining 1/4 for  a couple mini dessert pies: peaches and blueberries, anyone?
  • Do not be scared off by Pate Brisee! It’s easy and you will be so thankful you tried it. Store bought pie crusts will become a faded, distant memory. To save time, make up a couple batches of Pate Brisee and store it in the freezer. I’ve never known my mom to NOT have pie dough in her freezer.
  • Make sure you put in enough filling. It’s ok for the cups to be rounded full. And try experimenting with whatever fresh veggies & herbs you have on hand.
  • These Tomato & Zucchini Hand Pies are perfect for a picnic with your amour! I don’t know if tomatoes truly have aphrodisiac properties… but, put on a flowing summer skirt, spread out a pretty picnic blanket, open a bottle of Prosecco to enjoy with your Tomato Hand Pies, play a little Etta James on your portable ipod speakers and I’ll bet the French weren’t that far off…

Everyday Decadence

Sometimes I don’t understand what is going on inside my own head (Craaaaazy Lady). I think to much about the future: one must have a plan after all, and I forget to cherish the moment and enjoy where I am right now, doing whatever it is that I am doing. So today, being a beautiful sunny, summer day, I am going to revel in the little everyday pleasures and realize how happy they can make me. I am going to cherish holding someone I love close, revel in the place I am, and be sensuous in the present….

I am going to enjoy life’s little, everyday pleasures. And just so I don’t forget here’s today’s list of decadence I will indulge in:

1. Listening to my favorite song at top volume and singing along.

2. CHOCOLATE.

3. Kissing someone I love.

4. Endorphins from a running high.

5. An iced latte (but let’s not push the limits. It’ll still be skinny).

6. Really great advice.

7. Smiling at a stranger, just because.

8. A new magazine.

9. The wind in my hair as I ride my yellow beach cruiser.

10. Sunshine.

11. Clean, crisp white sheets.

12. Cart wheeling bare foot across the green lawn.

13. Laughing.

14. Starting the new book I got for my birthday.

15. Daydreaming about my next big vacation.

16. Sex!

17. Eating dinner outside, on the patio.

18. Fresh picked blueberries from a generous neighbour.

Blueberry & Cream Cheese Muffins

adapted from Squirrel Bakes

Streusel Topping:

  • 1/4 C flour
  • 1/4 C sugar
  • 1/4 tsp cinnamon
  • 2 Tbsp cold butter
  • Combine to form coarse crumbs

Muffins:

  • 3/4 C milk
  • 1/4 C oil
  • 1 egg at room temperature
  • 2 C flour
  • 1/2 C sugar
  • 2 tsp. baking powder
  • 1/2 tsp salt
  • 1 1/2 C fresh blueberries
  • Whisk together milk and oil and egg.
  • Sift together flour, sugar, baking powder and salt. Add to wet ingredients but do NOT over mix.

Cream Cheese Filling:

  • 4 oz. light cream cheese at room temperature
  • 1/3 C sugar
  • 2 Tbsp beaten egg (about 1/2 an egg) at room temperature
  • 1/4 tsp vanilla
  • Beat until smooth

Directions (makes 12 muffins):

  • Preheat oven to 400 degrees.
  • Grease muffin tin or line with paper liners.
  • Spoon about 1 Tbsp muffin mix into each muffin cup. Top with half the berries then 1 Tbsp of cream cheese mixture. Spoon over remaining muffin mix and berries. Sprinkle with streusel.
  • Bake 22-25 minutes.

Notes:

  • Thanx to my generous neighbor for the fresh picked blueberries!
  • It might look like too many blueberries at first but as the muffin bakes and puffs up the blueberries spread out quite a bit. I used 1 C the first try and 1 1/2 C the second time around.
  • Store in an airtight container for no more than one day. The muffins also freeze really well.
  • You know what would be great with the blueberry “muffin” for breakfast (if one can call a baked good with cream cheese and streusel, a muffin)… A cold, iced coffee. What’s on your list of daily decadence? (comments welcome!)

Just Dinner?

It’s next to impossible to separate food and cooking from the rest of my life; family drama, birthday parties, births (or lack of, in my infertile case), emotional healing (still working on that one with plenty of chocolate), weekends at the cabin, Sunday lunches at Mom’s, daily dinners with my husband. It’s all one.

Is food ever just food? How intertwined are food and relationships (and yes, even sex) in your everyday life?

It’s a way of getting to know each other and quite possibly, ourselves. Take for example, the ritual of dating. How many dates have you ever gone on that didn’t involve any food at all? Be it a new guy or even your group of closest girlfriends, how much didn’t you learn, love it or hate it, about your date from what they ordered. Or how they ate it (is an open-mouthed chewer a deal breaker?). Or how they treated your server. I can clearly remember the first meal my husband ever cooked for me in his tiny, basement rental apartment in university. We joke about it to this day and, thankfully, his cooking skills have grown by leaps and bounds as has our relationship.

Food is a way to express my emotions. It lets me be who I am and maybe lets me project a little of who I want to be. Feeling lonely? Turn on the oven for your favorite brownies. Feeling sassy? Chop up a little spicy jalapeno pico de gallo. Adventurous? Try that  recipe for Moqueca de Peixe from your last trip to Bahia. Want to impress your husband after…er.. at dinner? Blueberries and chipotle peppers…. a little sweet with firey heat…

Chipotle & Blueberry Pulled Chicken Sliders

adapted from Satisfied

2 bone in chicken breasts

Rub:

  • 1 Tbsp Mexican chili powder
  • 1/2 Tbsp each kosher salt, pepper and brown sugar
  • 1 tsp. each garlic powder and onion powder
  • 1/2 tsp each smokey paprika and cumin

Rub over chicken and refridgerate, covered at least four hours

Sauce:

  • 1 small Vidalia onion sliced
  • 2 whole garlic cloves
  • 1 chipotle pepper with adobo sauce
  • 1 Tbsp brown sugar
  • 1/4 C apple cider vinegar
  • 1/3 C stock
  • 1 small bay leaf
  • 1 C fresh blueberries
  • 1/4 C blueberry preserves
  • 1 Tbsp honey
  • Salt and pepper to taste
  • Preheat oven to 300 degrees.
  • In a large pot, on medium high, sear chicken on all sides then remove (you might need some olive oil to prevent sticking).
  • Add onions to the pot and cook 3-4 minutes. Add in garlic, chipotle pepper with sauce, and brown sugar. Cook one minute until the brown sugar is dissolved. Add vinegar, stock and bay leaf. Stir, then put chicken back in the pot. Cover, and braise in oven for one hour (the bbq works well too if it’s sweltering hot and you don’t want to turn on your oven. Just make sure you have a pot you don’t really care about.).
  • Remove chicken, allow to cool then pull apart with two forks and set aside.
  • Meanwhile, add berries and preserves to remaining liquid. Place on stove and bring to a low simmer for one minute.
  • Pour liquid into blender and puree until smooth then return to pot.
  • Add honey and salt and pepper to taste. Simmer to thicken about 5-10 minutes.
  • Add 1 cup to the shredded chicken to moisten. Reserve the rest to pour over sliders or for future use.

Buttermilk Biscuits

  • 2 C flour
  • 2 rounded tsp. baking powder
  • 1 tsp salt
  • 4 Tbsp unsalted butter
  • 1 C buttermilk
  • Preheat oven to 450 degrees.
  • Sift together the dry ingredients. Add butter and using your hands combine until the mixture resembles coarse, lumpy sand.
  • Add buttermilk and stir (I used my hands) until just combined.
  • On a floured surface, flatten the dough to 1/2″ thick and cut out round biscuits. I used a juice cup to make 10 biscuits. Brush the top with milk and bake on a parchment lined sheet for 10-12 minutes.

Notes:

  • The original recipe was doubled from above. I found the recipe, as I listed above, made 5 very large sliders with leftovers. I had 5 biscuits leftover and enough meat for two more sliders. That of course, will vary according to how large your chicken breasts are to begin with, and how much meat you like on your sandwich! We used up ALL the sauce.
  • You might want to start with half a chipotle pepper, depending on how spicy you like your food. One whole pepper was quite hot.
  • The meat takes on an interesting greyish-blue hue once the sauce is added. Don’t let that deter you – it’s super good!
  • The biscuits can be made ahead, but they are best served warm. It works really well to pop them in the oven while you’re pulling apart the chicken.
  • The combination of sweet blueberries and spicy chipotle pepper is really quite ….uh hem… saucy (attire under your apron definitely optional)…

“Bosom Enemies”

We all have them.

Just like Louisa May Alcott’s Little Women. Our “bosom enemies.”

Those special, little (well, some might not call them so little) faults that are uniquely our own and shape who we are. Like the tendancy to procrastinate anything with or without a deadline. Or a sense of wit that has the ability to come across as scathing sarcasm. For some of us, like Jo (but certainly not me) it’s anger. Anger used to gratify ourselves and our crap behaviour.  Anger used for denying our innermost fears. Or maybe anger used as self-justification for our actions. Left unchecked it can become one’s worst demon (again, not mine). But, like Jo’s father advises, one must empoly a self-discipline to fight those inner bosom enemies to earn a sweetness and sense of self-control.

But that’s easier said than done. Especially when it comes to self control and food.

And for me, just like Alcott’s characters, my bosom enemies are always ready to flare to up lest I continually and bravely try to conquer them.  But I don’t think I’m going to try and overcome my unconditional, and unreturned love for Bing cherries. I am going to indulge it. And revel in it. And sweetness of character be damned: I’m going to luxuriate in it with some dark chocolate.

Cherry & Chocolate Muffins

adapted from Baker’s Daughter

  • 2 C flour
  • 1 Tbsp baking powder
  • 1 1/2 C rolled oats
  • 1/2 C packed, brown sugar
  • 2 large eggs
  • 1/4 C butter, melted
  • 1/4 C unsweetened applesauce
  • 1 tsp vanilla
  • 2/3 C milk
  • 2 C pitted and halved, fresh cherries
  • 3/4 C dark chocolate chunks
  • Preheat your oven to 350 degrees and grease your muffin tin or line with paper cups.
  • Sift together flour and baking powder. Stir in oats.
  • Beat together eggs, brown sugar and vanilla. Mix in butter and applesauce.
  • Alternately add flour mix and milk to wet ingredients starting and ending with the flour mix.
  • Fold in cherries and chocolate chunks.
  • Bake approximately 20 minutes.

Notes:

  • Makes 14 to 15 large muffins.
  • Like usual, I substituted half the butter for applesauce in attempt to make “healthier.” (read: run a little less) According to the interwebs if you make 15 muffins you’re looking at about 216 calories, 7 g fat, and 43 g carbs each. Just in case you wanted to know.
  • I used super dark and sweet Bing cherries, but if you could find sour cherries those would be really good. I think you could use whatever type of fruit you had on hand. Blueberries might be good.
  • I used dark chocolate (70% Valrhona) but again, use what you like.
  • There are few things that inspire in me a complete and utter lack of self control. Dark chocolate. And super dark, sweet, Bing cherries. I can not be held responsible for my actions with either.

What If

Do you ever play what if?

Have you ever wondered, at one time or another, how your life would have turned out IF….

Wondered what direction you could have gone IF…

Wondered whose path you would have crossed, or not crossed, IF…

I have a bunch of  “what IF’s.” What if I had taken something different in University. What if I hadn’t left the big city. What if I’d chosen the other job offer. What if I’d known fifteen years ago I couldn’t have kids. What if I’d been strong enough to stand up for what I wanted.

What IF….

What if I lived in the present and enjoyed this moment. This moment, right here and right now. Maybe I should leave those big, life changing, “what if’s” in the past and instead be grateful for what is in front of me right now. My family and friends who love me. The summer weather. My runners. My Mom’s recipe for pie crust. Or pate brisse for you fancy people. Attempting my first pie crust is not a huge, life altering feat. But it’s where I am right now. And you know what, at this present moment it feels right; sitting here with my handsome love, laughing, and eating an insanely heavenly galette. And that’s all I’ve got.

Strawberry & Dark Chocolate Mini Galettes

Pie Crust

  • 1 C flour
  • 2 Tbsp sugar
  • 1/4 tsp salt
  • 1/2 C cold butter
  • 4-5 Tbsp ice water
  • Whisk together flour, sugar, and salt. Chill.
  • Cut in butter until chunks are pea sized. Slowly mix in ice water. Do NOT overwork the dough. Form into a ball, wrap in plastic then chill at least one hour or up to 24 hours.

Dark Chocolate Ganache:

  • 1/2 C dark chocolate, chopped (I use Valrhona 70% dark chocolate)
  • 2 Tbsp milk or cream
  • Bring cream just to a boil. Pour over chocolate then whisk until smooth

Strawberry Filling:

  • 3-4 cups sliced, fresh strawberries (or any type of fruit you like that is in season)
  • 1  tsp lemon juice
  • A few tbsp sugar, depending on how sweet you like your filling. I used 2 Tbsp.
  • A tsp or so of cornstarch, also depending on what type of fruit you use.
  • Combine all filling ingredients and stir to combine well.

To make the mini Galettes:

  • Preheat your oven to 450.
  • Line a baking sheet with parchment.
  • Remove dough from fridge and divide into 6 balls. Roll each into a 4-5″ circle.
  • Spread over desired amount of ganache leaving a 1″ border. Top with berries.
  • Fold up edges of pie crust. Brush with an egg white and sprinkle with sanding sugar.
  • Bake on parchment paper for 20 minutes or until crust is golden brown.

Notes:

  • It might sound daunting but it’s not! Pie crust is so easy, once you’ve tried it you will never want store bought again. The recipe above is only a half recipe.
  • Leave behind as much of the juice from the berries as possible. Also, I think I overfilled the galettes. Some of the crust didn’t stay folded over but the galettes tasted yummy anyway. The crust was super light and flakey. I think the key is to leave small chunks of butter for flakiness. I also put ice-cubes in my water to ensure it stayed cold while working.
  • If you want, you could make one large galette. Try for about a 12″ circle of pie crust.
  • This recipe is rather made up. I perused a bunch of foodie sites, salivated at the pictures, then determined I was in the mood for chocolate (big surprise) and I had a bunch of fresh strawberries from the market…so viola! Strawberry & Chocolate Mini Galettes.

For The Love Of…

Did you know in some countries mangos are considered the symbol of love? I can clearly understand why mangos are so revered: tangy and exotic when still green and fresh. Your heart skips a beat with every glance and taste. Yet, so sweet and familiar when ripe, like a satisfying, life-long love.  It’s easy keep mangos near and dear to your heart.

And your kitchen. Their intense, sunny aroma. Bright hued yellow fruit.

Mangos, to me, are the essence of the tropics.  Just looking at them transports me to a vacation paradise. A hot, and steamy paradise where the last thing you want to do is turn on your oven. So don’t. Transform your kitchen from a sweltering furnace into a tropical summer oasis and add some sizzle to your love… errr….. table… with a spicey, colorful Thai Mango Slaw. Like a vacation for your senses.

Perfect for lunch while lounging on a teak deck, under a banyan tree, balmy ocean breeze rustling your sarong, hand in hand with your true love…

Thai Mango Slaw

only slightly adapted from Smitten Kitchen

  • 1 mango, peeled and julienned
  • 1/2 lb. cabbage, julienned
  • 1/2 red pepper, julienned
  • 1/4 red onion, very thinly sliced
  • small carrot, julienned
  • juice and zest from one lime (about 3 tbsp. juice)
  • 2 Tbsp. rice vinegar
  • salt to taste
  • 1/2 tsp. chili paste (sambel ulek)
  • 3 Tbsp. thinly sliced mint leaves
  • 1 Tbsp. chopped peanuts
  • Toss mango, cabbage, pepper, onion and carrot in a bowl. Whisk together lime juice, zest, vinegar, salt, and chili paste. Pour over slaw and mix until well combined. Serve immediately or within one hour. Keep cool if not serving soon. Top with mint and peanuts just before serving.

Notes:

  • The original recipe called for napa cabbage which, in the Middle Of Nowhere is a foreign concept. Just like, I imagine, having mango in your slaw is a little alien. I ended up buying a bag of pre-cut slaw which worked just fine.
  • There is also oil in the original recipe which I omitted. Just because.
  • I halved the recipe (the halved version above) because we are only two…we almost finished it as a side dish, if you’re serving a larger family I would double the recipe (ie. use 2 mangos, an entire bag of cabbage slaw, etc).
  • I served it with BBQ chicken that I marinated in mango chutney, lime juice, soy sauce, chili paste, a little honey, a dash of cumin and curry powder. Yum!
  • For the ripeness of the mango: choose what you like best. I don’t like mine too ripe so I picked a medium firm mango. In a true Thai salad, I think the mango would be pretty green and tart. If you get a mango that is to0 ripe it will turn to mush in the salad.

BONUS points awarded if you can tell me exactly where I took the polaroid picture.

First Taste of First Love

Your first love…will the flame always burn?

I’ll bet somewhere you have a collection of old love notes, pictures, concert ticket stubs and cards from your first love. When you look through those momentos, or hear a certain song (Chicago, Richard Marx, Foreigner, Cyndi Lauper… ooh the allure of 80’s love ballads. Admit it, right now you’re singing “Time After Time”), or maybe even cross paths with your former flame….your heart might beat a little faster. You might even let old emotions resurface and remember that first sweet kiss, that first taste at what you believed to be true love.

Simple….innocent…carefree…

But we all grow UP (Not old. Not me. Nooooo sir.). Our tastes develop and mature and we move on. Love has more layers. Gets more complex and intricate. Kind of like appreciating Zucchini Carpaccio with Homemade Ricotta Cheese or Zucchini Blossoms Stuffed with Tomatoes and Parmesan. But just like that first kiss, I’ll never forget my fist zucchini yearning. Printed on an old recipe card found lurking in the depths of my recipe box, a straight forward, uncomplicated chocolate zucchini cake.

Simple…effortless…and fresh…

Chocolate Zucchini Cake

  • 1/4 C butter
  • 1/2 C apple sauce
  • 1 1/2 C sugar
  • 2 eggs
  • 1 tsp. vanilla
  • 1/2 C buttermilk
  • 2 1/2 C flour
  • 1/2 C cocoa
  • 1 tsp. baking soda
  • 1 tsp. baking powder
  • 1/2 tsp. salt
  • 1 tsp. cinnamon
  • 1/2 C dark chocolate chips
  • 2 C finely grated zucchini

Topping:

  • 1/4 C chocolate chips
  • 1/4 C brown sugar
  • Lightly grease a 9×13 pan and preheat oven to 350 degrees.
  • Beat butter and sugar until light and fluffy. Add in eggs one at a time beating well after each. Add in apple sauce and vanilla.
  • Sift together flour, cocoa, baking soda and powder, salt and cinnamon. Add to wet ingredients alternating with buttermilk. Once combined fold in zucchini and chocolate chips.
  • Sprinkle over remaining chocolate chips and brown sugar.
  • Bake for approximately 30 minutes

Notes:

  • This recipe comes from my mom. It’s one of the first cakes I ever made and always turns out. I look forward to making it every summer when the zucchini is fresh.
  • This cake stores well on the counter for a day or two…if it lasts that long! It also freezes really well. IF there are leftovers (ie. I haven’t wanted to run a zillion miles the day after baking it) I wrap the leftover pieces individually and freeze to be enjoyed at a later date. But not that much later….
  • The original recipe called for 1 C butter instead of 1/4 C butter and 1/2 C applesauce. It also called for 1 3/4 C sugar. Go ahead, if you want but you really won’t notice a difference in taste. Honest.
  • My husband thinks it needs more brown sugar on top. His opinion is very important.
  • Buy some really good cocoa. It makes a HUGE difference.
  • Lastly…preheat your oven! That way it’s ready to go when your cake is mixed. It’s a good idea to NOT let your batter sit on the counter or the rising agents don’t work as well. Well, that’s what I read. And I stick to it. When I remember…

“You used to be much more muchier…you’ve lost your muchness.” The Mad Hatter to Alice

What is muchness? A state of being, a feeling, an emotion? A confidence or fearlessness? Or perhaps it’s a comfortableness with who you are; owning up to your quirks and loving them for everyone to see and in my case, hear.

Have you ever felt that you’re losing your muchness? I have…. it’s like there is a dimness where my eyes used to sparkle. Like everything I used as a landmark has shifted and suddenly I don’t know who I am anymore or where I fit in, whatever I used as a bearing – gone. For some reason my shiny red shoes aren’t quite as alluring and haven’t seen the dance floor in a while. My car concerts haven’t been quite as rockin’ and I’m driving with the windows rolled all the way up, sun roof tightly sealed in fear of rain whether from the sky or my tears.

While these sassy, ruby Raspberry Breakfast Bars might not remedy all your lost muchness, they will give you something to look forward to. Whether it’s your commute to the office (and yes, I live in a small town where the longest commute is all of four blocks…but some of you out there on the interwebs must face daily traffic of horrific proportions), slugging through your never ending to-do list, or just facing the mundaneness of everyday life. These bars might not give you instant passion. I can’t guarantee you’ll gain immediate confidence or inspiration. But hopefully they’ll put the start of a little sparkle back in your muchness….

Raspberry Breakfast Bars

very minimally adapted from Smitten Kitchen

Crust & Topping:

  • 1  1/2 C Flour
  • 1 C Brown sugar, firmly packed
  • 1  1/4 C Rolled oats
  • 3/4 tsp Salt
  • 3/4 tsp Baking powder
  • 1/2 tsp Baking soda
  • 1/2 tsp Cinnamon
  • 1/2 C Butter, cubed, still cool
  • Combine all the ingredients until loose crumbs form. I used my hands because it seemed like fun, however you can use a food processor.
  • Reserve about  1  1/2 C of the topping. Pour the rest into a greased 9×13 pan making sure the crumb mixture is level and reaches all corners. Do not pack down profusely.
  • Bake 12-15 minutes until golden brown.
  • Let the crust cool while you make the filling.

Filling

  • 1/4 C Brown sugar, firmly packed
  • 1 Tbsp Grated lemon zest
  • 1/2 tsp Cinnamon
  • 2 Tbsp flour
  • 1 Lb. Fresh raspberries
  • 1/4 C Fresh lemon juice
  • 1 Tbsp Butter melted
  • Whisk together all ingredients, except the raspberries, until well combined.
  • Add the raspberries and mix gently using your hands (again: it was kinda fun getting my hands all berry stained).
  • Spread the raspberry mixture over the prebaked crust. Sprinkle with the remainder of the reserved crust mixture.
  • Bake 35-45 minutes until the edges are bubbling and the crust is golden brown.
  • Cool completely on a wire rack.

Notes:

  • The original recipe calls for 3/4 C butter for the crumb mixture. Because I am a low-fat-freak I only used a scant 1/2 cup. The crumb mixture could have stuck together better. I’m sure more butter would be yummier & produce a crispier crust.
  • I left the bars covered on the counter for one day. Then I wrapped them in individual servings and put them in freezer. Where I could not take a bite every time I walked by.
  • If you’re wanting a super sweet bar, you might be disappointed. These are tangy-ish. Not really for desert, hence the name.
  • Just a word of advice: if using fresh, local berries buy more than one pound. Buy two. Or more. Unless you want to make a return trip to the farmer’s market like I had to do.
  • And PLEASE: always use fresh ingredients. You’re food will taste so much better. I promise. There is no bottled lemon juice or frozen produce in this house. Buy what is in season.
  • Ok. That’s it. Enjoy. I already feel my muchness returning….

DANCE FIRST. Think later. It’s the natural order of things. Samuel Beckett

I over-analyze things. I’m impatient with myself. I judge myself. Harshly. I get caught up in things if they don’t go exactly as I hoped, planned and desired for.

But today I’m going to forget all that. I’m going to put on some groovin’ tunes and dance with complete abandon. I am going to dance until the sweat is pouring off me and a smile breaks free. I am going to dance until this week is a thing of the past. I am going to dance until I fall to the ground in a happy exhaustion.

Lest we forget, I grew up in very small, conservative community. I didn’t attend my first dance until I was in high school and it most certainly was not a school sanctioned event. Oh no. Dancing & rock’n’roll might lead to all kinds of debauchery. My first “dance” was in a friend’s dimly lit, musty basement while her parents were gone on holidays. If, in your mind, you are picturing Footloose, you’re not that far off. Just like Ren & Ariel, we danced like there was no tomorrow. Nothing could bring us down…

So I’m going to turn up the volume on ol’ Kenny Loggins, and put a little rythym back in my battered soul. I’m going to shimmy my way to the kitchen and put a little fire in my spirit and maybe my belly depending on how spicy I’m feeling…

Boka Dushi

Dutch West Indian Chicken Kebabs with Peanut Sauce

slightly adapted from Cooking Light

  • 1/4 C Kejap manis (Usually available at your local supermarket. It’s a sweet soy sauce.)
  • 1 Tbsp Fresh lime juice
  • 1 tsp. Cumin
  • 1 Tbsp. Grated, peeled fresh ginger
  • 1 tsp. Sambal ulek (spicy garlic chili paste)
  • 1/2 tsp. Tumeric
  • 3-4 Boneless, skinless chicken breasts cut into 1″ strips
  • Combine all ingredients in a large zip lock bag and marinate for at least one hour.
  • Thread chicken onto skewers and BBQ until done. Serve with Dutch West Indian Peanut Sauce.

Dutch West Indian Peanut Sauce

  • 1/3 C Chicken broth
  • 3 Tbsp. Peanut butter
  • 1/2 C Chopped, seeded tomato
  • 2 Tbsp. Minced green onion
  • 2 Tbsp. Chopped fresh cilantro
  • 1/2 Tbsp. Fish sauce
  • 1 Tbsp. Fresh lime juice
  • 2 tsp. Grated, peeled fresh ginger
  • 1 tsp. Sambal ulek (or more if you like heat!)
  • 1 tsp. Honey
  • 1 Garlic clove, crushed
  • Combine broth and peanut butter in a small saucepan. Cook over low heat, whisking the entire time until combined, about 4-5 minutes.
  • Stir in remaining ingredients.
  • Serve at room temperature.

Notes:

  • I always use the lowest fat peanut butter I can find (big surprise). It doesn’t seem to make a difference in this recipe. I also like the texture of chunky peanut butter but use whatever you prefer.
  • This goes really well with coconut rice. Just fry up a little garlic and ginger. Add jasmine rice and continute to fry for a minute or two until the aroma of the rice starts wafting from the pot. Add the usual amount of liquid but substitute (light) coconut milk for half the water, throw in a little lemon zest and honey and cook as per usual.
  • Yum! Perfect for dining al fresco with a mojito. Although I might change my 80’s playlist for something a little more patio worthy.